Why Would You Need to Censor a Photo?
Before you start going wild with the blur tool, let's talk about why people censor photos in the first place. Spoiler: it's not just for dramatic movie trailers.
Privacy regulations like GDPR in Europe and CCPA in California mean that sharing someone's face without consent can get you into actual legal trouble. Even outside formal regulations, basic digital etiquette says you shouldn't blast a stranger's face across the internet without asking first. Your mom taught you manners - this is the digital version.
Protecting Identities
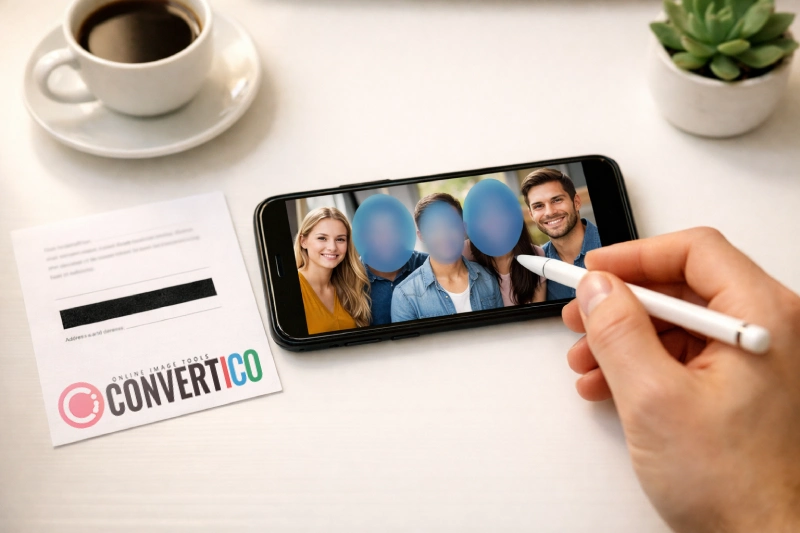
Blur faces of bystanders, children, or anyone who hasn't consented
Hiding Sensitive Data
Redact license plates, addresses, documents, or personal info
Professional Compliance
GDPR, HIPAA, and other regulations require image redaction
Common scenarios include blurring faces in street photography, pixelating license plates before posting car photos online, redacting personal information in screenshots of documents, and hiding sensitive details in real estate or property photos. Basically, anytime your image contains something that shouldn't be public, censoring is the answer.
Censoring Methods Explained - Blur, Pixelate, and Black Bar
Not all censoring is created equal. Each method has its own personality (and yes, we're about to give personality traits to image filters).
Gaussian Blur
Applies a smooth, out-of-focus effect. Colors blend softly, making it look natural. Best for faces and backgrounds where you want subtle censoring that doesn't scream "I'M HIDING SOMETHING."
Pixelation (Mosaic)
Enlarges pixel blocks to create a mosaic effect. The classic censoring method you've seen in every news broadcast ever. Clearly intentional and highly effective at destroying detail.
Black Bar
The nuclear option. Covers areas with a solid black (or colored) rectangle. Zero chance of recovering anything underneath. Commonly used for text redaction and formal document processing.
Color Bar
Same concept as the black bar, but with a custom color. Handy for matching your brand's aesthetic or making the censoring blend more naturally with the surrounding image content.
Security tip: Blur and pixelation can sometimes be partially reversed using AI-based tools if the intensity is too low. For maximum security - especially on text or license plates - use a black bar or high-intensity pixelation. When in doubt, cover it up completely.
How to Censor a Photo Online (Step-by-Step)
You don't need Photoshop, expensive software, or a degree in image editing. Here's how to censor any photo in under 30 seconds using a free online tool:
- Upload your image - Head to ConvertICO's Censor Photo tool and drop your image into the upload area. We support PNG, JPG, WebP, and most common formats.
- Pick your censoring method - Choose between Blur, Pixelate, Black Bar, or Color Bar depending on your needs (see the section above if you're unsure which to pick).
- Select a shape tool - Rectangle for clean boxes, Ellipse for faces, or Freehand Brush for irregular areas that don't fit neat shapes.
- Draw over the area to censor - Click and drag directly on the image. You can add multiple censored areas, mix different methods, and adjust intensity as you go.
- Adjust intensity - Slide it up for heavy censoring (recommended for sensitive data) or down for a lighter touch on non-critical areas.
- Download - Choose your preferred output format and quality, then hit Download. That's it - you're done.
Ready to Censor Your Photos?
Free, private, and works entirely in your browser - no uploads to any server.
Censor Photo Now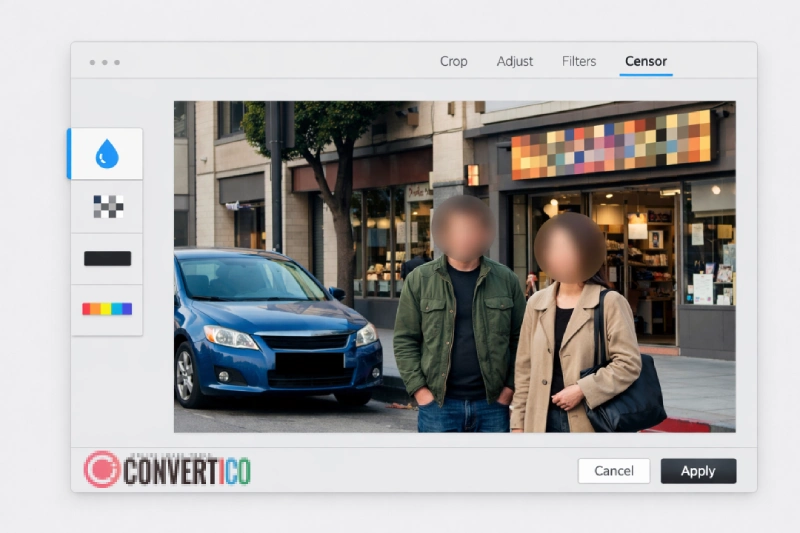
What You Should Always Censor Before Sharing Photos Online
Think you're careful about what you share? You might be surprised. Here's a checklist of things people routinely forget to censor before posting photos:
| What to Censor | Why It Matters | Recommended Method |
|---|---|---|
| Faces of strangers or minors | Privacy laws, consent requirements | Blur or Pixelate |
| License plates | Can be used to track vehicle owners | Black Bar or Pixelate |
| Home addresses / street signs | Location privacy and personal safety | Black Bar |
| Document text (IDs, mail, bills) | Identity theft risk | Black Bar (strongest) |
| Computer screens / phone screens | May contain passwords, emails, DMs | Blur or Pixelate |
| Barcodes / QR codes | Can contain personal or financial data | Black Bar |
| Medical information | HIPAA and health privacy regulations | Black Bar (always) |
Don't forget EXIF data! Your photo's metadata can contain GPS coordinates, camera info, and timestamps even if the visible image looks clean. Use our EXIF file viewer to check what hidden data your photos carry, and strip it with our metadata remover before sharing.
Blur vs Pixelate - Which Is More Secure?
This is one of those debates that comes up a lot, so let's settle it with some real talk.
Pixelation is generally more secure because it destroys information more aggressively. When you pixelate an area, the original pixels are grouped into large blocks and averaged out. The original detail is mathematically gone. Researchers have demonstrated that lightly blurred text and faces can sometimes be reconstructed using machine learning algorithms, but heavily pixelated content is much harder to recover.
Blur can be deceiving. A light Gaussian blur might look censored to the human eye, but sophisticated AI tools can sometimes reverse-engineer the original details - especially for text. If you're blurring a handwritten note or a printed address, you might think it's unreadable, but a determined person with the right software could potentially recover it.
Here's the practical takeaway:
- For faces: Both methods work well at medium-to-high intensity. Blur looks more natural; pixelate is more obviously intentional.
- For text and numbers: Use pixelation at high intensity, or better yet, use a solid black bar. Don't risk it with light blur.
- For maximum security: Always use a black bar or color bar. There's zero chance of recovering what's underneath a solid rectangle.
Why Browser-Based Censoring Is Safer
Here's something most people don't think about: when you upload a photo to a "free online tool," where does that photo go? Many services upload your image to their servers for processing, which means a copy of your uncensored photo now exists on someone else's computer. That's... not ideal when you're trying to protect privacy.
Browser-based tools like our censor photo tool are fundamentally different. All processing happens directly in your browser using JavaScript. Your image never leaves your device - it's never uploaded, stored, or accessible to anyone. The censoring happens right on your machine, and the result is downloaded straight to your downloads folder.
This matters because:
- No server-side copies of your sensitive images exist
- No risk of data breaches exposing your uncensored photos
- Works offline once the page is loaded (try it - turn off WiFi after loading)
- Processing speed depends on your device, not internet connection
When choosing any photo censoring tool, always check whether it processes locally or uploads to a server. Your privacy-sensitive photos deserve the local approach.
Common Photo Censoring Mistakes (And How to Avoid Them)
Even well-intentioned censoring can fail if you're not careful. Here are the most common mistakes people make:
1. Using blur that's too light. If you can still recognize the person or read the text through the blur, it's not censored - it's just slightly out of focus. Crank up the intensity. A good rule of thumb: if you can guess what's underneath, it needs more censoring.
2. Forgetting reflective surfaces. That license plate you carefully blurred? It might be visible in a car window reflection, a puddle, or a shiny surface in the background. Always scan the entire image for unintended reflections.
3. Using overlay methods instead of destructive edits. Some tools add a colored layer on top of the image rather than actually modifying the pixel data. This means someone could potentially remove the overlay and see what's underneath. Our censor tool permanently destroys the original pixel data - there's no hidden layer to peel back.
4. Not censoring metadata. The image itself might be perfectly redacted, but EXIF data can still contain GPS coordinates, timestamps, and device information. Use our EXIF file viewer to check what metadata your photo contains, then strip it with the metadata remover.
5. Only censoring one copy. If you've shared the uncensored version somewhere else - cloud storage, messaging apps, email - the censored version doesn't help much. Make sure you also remove or replace the original uncensored copies.
Advanced Censoring Tips for Professionals
If you regularly need to censor images - for journalism, HR departments, legal work, or content moderation - here are some pro-level tips:
Mix methods strategically. Use blur for faces (looks natural), pixelation for license plates (clearly intentional), and black bars for document text (maximum security). Our tool lets you apply multiple methods to the same image, so you can tailor the censoring to each element.
Use the freehand brush for irregular shapes. Not everything fits a neat rectangle. The freehand brush tool is perfect for censoring handwritten signatures, curved text, or irregularly shaped sensitive areas.
Consider your output format. After censoring, save as PNG for screenshots and documents (lossless quality) or JPG for photographs (smaller file size). If you need to convert between formats afterward, use our PNG to JPG converter or image converter.
Batch processing workflow. If you have many images to censor, develop a consistent workflow: censor first, then resize, then compress. This order ensures the censored areas maintain their integrity through subsequent edits.
Frequently Asked Questions
Can censored photos be uncensored or reversed?
It depends on the method used. Solid bars (black or color) are completely irreversible - the original pixel data is destroyed and replaced. High-intensity pixelation is extremely difficult to reverse. Light blur is the least secure and can sometimes be partially reversed by AI tools. For maximum security, always use a solid bar or high-intensity pixelation via a tool like our photo censor.
Is it safe to censor photos using online tools?
It depends on the tool. Some online services upload your images to their servers for processing, which means your uncensored photos exist on someone else's computer. Browser-based tools like ConvertICO process everything locally in your browser - your images never leave your device. Always check whether a tool processes locally or server-side before uploading sensitive photos.
What's the best method to blur faces in photos?
For blurring faces, both Gaussian blur and pixelation work well at medium-to-high intensity. Blur creates a softer, more natural look while pixelation is more clearly intentional. Use the ellipse shape tool for faces, as it follows facial contours better than a rectangle. You can blur faces in photos for free using our browser-based tool.
How do I censor a license plate in a photo?
Use a black bar or high-intensity pixelation with the rectangle shape tool. Black bars are recommended for license plates because they completely destroy the underlying data with zero chance of recovery. Simply upload your photo, select Black Bar mode, draw a rectangle over the plate, and download the result.
Do I need to censor faces for GDPR compliance?
Under GDPR, facial images are considered personal data. If you're publishing photos of identifiable individuals without their explicit consent, you may be in violation. The safest approach is to blur or pixelate any recognizable faces before sharing. This applies to businesses, bloggers, journalists, and anyone publishing photos that include identifiable individuals in the EU/EEA.
Can I censor multiple areas in the same photo?
Yes. Most photo censoring tools allow you to draw as many censored areas as needed. You can even mix different methods - for example, blur faces while using black bars over text - all in the same image before downloading.