Ever tried to put your logo on a colored background only to see that ugly white box ruining everything? Yeah, we've all been there. Transparent backgrounds are like the invisibility cloak of the image world - they let your subject blend seamlessly into any design without that awkward rectangular outline screaming "I was copy-pasted!"
Whether you're a small business owner creating marketing materials, a content creator working on YouTube thumbnails, or just someone who wants their cat photo to float majestically over a space background (no judgment here), understanding image transparency is a game-changer.
In this guide, we'll walk you through everything from the basics of transparent images to advanced techniques using free online tools, Photoshop, and AI-powered magic. By the end, you'll be removing backgrounds like a pro - and probably wondering why you ever put up with those white boxes in the first place.
What Is Image Transparency and Why Does It Matter?
Image transparency refers to areas of an image that are see-through rather than filled with a solid color. Think of it like a window - where there's transparency, whatever's behind the image shows through. This is fundamentally different from having a white or black background, which will always appear as that color regardless of where you place the image.
The magic happens through something called the alpha channel. While regular images store information about red, green, and blue (RGB) colors, images with transparency add a fourth channel that tells the computer how opaque or transparent each pixel should be. Values range from completely transparent (invisible) to fully opaque (solid), with everything in between creating semi-transparent effects.
Real-World Applications
Transparent images are everywhere once you start looking. Logos on websites that adapt to both light and dark themes, product photos on e-commerce sites that float cleanly on the page, app icons on your phone's home screen, digital stickers and emojis - they all rely on transparency to look professional and polished.
For businesses, transparent logos and graphics mean you can use the same asset across business cards, letterheads, social media, merchandise, and websites without creating separate versions for each background color. That's not just convenient - it's a significant time and cost saver.
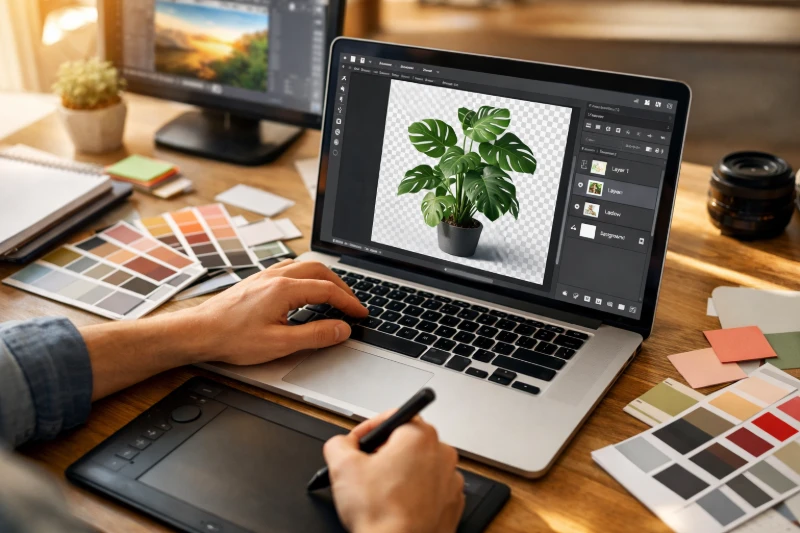
Pro Tip: The classic checkered pattern (gray and white squares) you see in image editors isn't actually part of your image - it's just a visual indicator showing where transparency exists. Export your image and those checkers disappear!
File Formats That Support Transparency
Not all image formats are created equal when it comes to transparency. Choose the wrong format and your carefully crafted transparent background gets replaced with solid white faster than you can say "why isn't this working?" Here's your cheat sheet:
PNG - The Transparent Champion
PNG (Portable Network Graphics) is the go-to format for images with transparency. It supports full alpha channel transparency, meaning you can have pixels that are completely transparent, completely opaque, or anywhere in between. This allows for smooth edges, subtle shadows, and professional-looking feathered effects. PNG uses lossless compression, so your image quality stays intact, though file sizes can be larger than JPEGs.
WebP - The Modern Alternative
WebP is Google's newer image format that supports both transparency AND superior compression. You get smaller file sizes than PNG with the same quality - perfect for websites where every kilobyte counts. The trade-off? Some older browsers and applications don't support it yet, though compatibility has improved dramatically.
GIF - Limited But Useful
GIF supports transparency but with a catch - it's binary. Each pixel is either fully transparent or fully opaque, with no in-between. This creates jagged edges on curved subjects (hello, 90s web graphics). However, GIFs can be animated while maintaining transparency, making them useful for simple animated stickers.
Formats That DON'T Support Transparency
JPEG/JPG does not support transparency at all. Save a transparent PNG as a JPEG, and your transparent areas turn white (or sometimes black). This is the most common mistake people make - spending time removing a background, then accidentally flattening it by saving as JPG. Always double-check your export format!
Need to Convert Between Formats?
Convert images while preserving transparency with our free online tools.
PNG Converter WebP ConverterHow to Remove Background Using Free Online Tools
Gone are the days when you needed expensive software to remove backgrounds. Today's free online tools use AI to do in seconds what used to take professionals minutes (or hours). Here's how to use some of the best options:
Method 1: ConvertICO Background Remover
Our background removal tool uses advanced AI to detect subjects and remove backgrounds automatically. It's particularly good at handling hair, fur, and complex edges that would be nightmares to select manually.
- Upload your image - Drag and drop or click to select. We support PNG, JPG, WebP, and most common formats.
- Let AI work its magic - Processing typically takes 3-10 seconds depending on image complexity.
- Review and refine - Check the preview. Need adjustments? Use our edge refinement tools.
- Download as PNG - Your transparent image is ready. We automatically save as PNG to preserve transparency.
Tool Comparison
| Tool | Free Tier | Best For | Speed |
|---|---|---|---|
| ConvertICO | Unlimited | General use, quick edits | Fast |
| Remove.bg | Limited resolution | Portraits, people | Very Fast |
| Canva | Pro subscription | Design integration | Fast |
| PhotoRoom | Watermarked | Product photos | Fast |
Watch Out: Online tools upload your images to external servers for processing. For sensitive or confidential images, consider using offline solutions like Photoshop or GIMP.
Removing Backgrounds in Photoshop
Adobe Photoshop remains the gold standard for professional image editing, offering multiple ways to create transparent backgrounds. While it has a learning curve, the precision and control it offers are unmatched. Here are the most effective methods:
Quick Method: Remove Background Button
Photoshop CC 2020 and later includes an AI-powered "Remove Background" feature that rivals dedicated online tools:
- Open your image in Photoshop
- Go to Window > Properties to open the Properties panel
- With the image layer selected, click "Remove Background"
- Photoshop's AI analyzes the image and creates a layer mask automatically
- Save as PNG (File > Export > Export As) with transparency enabled
Precision Method: Select Subject + Refine Edge
For images where the quick method doesn't quite nail it (especially with hair or fur), combine Select Subject with Select and Mask:
- Go to Select > Subject to create an initial selection
- Click "Select and Mask" in the options bar
- Use the Refine Edge Brush on hair, fur, or semi-transparent areas
- Adjust Smooth, Feather, and Contrast sliders for cleaner edges
- Output to "New Layer with Layer Mask"
- Delete the original background layer and export as PNG
Keyboard Shortcut: Press W to quickly access the Object Selection Tool, then Shift+W to cycle through Quick Selection and Magic Wand tools.
Manual Method: Pen Tool
For product photos, hard-edged objects, or when you need absolute precision, the Pen Tool creates perfect selections:
- Select the Pen Tool (P)
- Carefully trace around your subject, clicking to create anchor points
- Right-click and choose "Make Selection"
- With selection active, add a Layer Mask (Layer > Layer Mask > Reveal Selection)
- The background disappears, leaving your subject on transparency
Save Your Work: Always save a PSD file with layers intact before exporting to PNG. This lets you make adjustments later without starting from scratch.
GIMP: The Free Photoshop Alternative
GIMP (GNU Image Manipulation Program) offers professional-grade editing capabilities at exactly zero dollars. While the interface takes some getting used to, it's powerful enough for most background removal tasks.
Using GIMP's Foreground Select Tool
- Open your image and go to Layer > Transparency > Add Alpha Channel (this enables transparency)
- Select the Foreground Select Tool from the toolbox
- Draw a rough outline around your subject (doesn't need to be precise)
- Press Enter, then paint over the foreground (subject) to tell GIMP what to keep
- Press Enter again to generate the selection
- Go to Select > Invert, then Edit > Clear to delete the background
- Export as PNG (File > Export As, choose PNG format)
Color-Based Selection for Solid Backgrounds
If your image has a relatively solid background color (like a photo taken against a green screen or white backdrop), the Select by Color tool is faster:
- Add an Alpha Channel to your layer
- Select the "Select by Color" tool
- Click on the background - GIMP selects all pixels of that color
- Adjust the Threshold slider to capture more or fewer similar colors
- Press Delete to remove the selected background
- Use Select > None to deselect, then export as PNG
Best Mobile Apps for Background Removal
Need to remove a background on the go? These mobile apps bring professional-grade background removal to your pocket:
iOS Highlights
- Background Eraser - Simple interface with automatic and manual removal options. Free with ads, one-time purchase removes them.
- PhotoRoom - AI-powered removal with additional features for creating product photos. Free tier available.
- Pixelmator Pro - Full-featured editor with excellent ML-based removal. One-time purchase.
Android Highlights
- Background Eraser - Highly rated with both automatic and manual modes.
- Remove.bg - Official app from the web service, same AI quality on mobile.
- TouchRetouch - While primarily for removing objects, it handles background removal well too.
Tips for Getting Better Background Removal Results
The quality of your background removal depends heavily on your source image. Follow these tips to get cleaner results with less manual cleanup:
Before You Shoot
- Use contrasting backgrounds - A red shirt on a red background is a nightmare. Blue or green backgrounds contrast with most subjects.
- Ensure even lighting - Shadows on backgrounds create color variations that confuse AI tools.
- Keep subjects away from backgrounds - Distance reduces shadow casting and color spill.
- Shoot at higher resolution - More pixels mean cleaner edge detection.
During Editing
- Start with AI, then refine manually - Let automated tools do 90% of the work, then clean up edges.
- Zoom in to check edges - Artifacts and halos are easy to miss at 100% view.
- Add a slight feather - A 0.5-1px feather prevents harsh, unnatural edges.
- Check on multiple backgrounds - Test your transparent image on both light and dark backgrounds to catch issues.
Dealing with Hair and Fur
Hair is the ultimate background removal challenge. Those wispy strands blend with backgrounds in ways that confuse even advanced AI. For best results:
- Use tools with dedicated hair/edge refinement (Photoshop's Refine Edge, or online tools specifically marketed for portraits)
- Accept some loss - perfectly preserving every strand often isn't possible
- Consider adding a subtle outer glow or shadow after removal to mask imperfect edges
Ready to Remove Your Background?
Try our free AI-powered background remover - no signup required.
Remove Background NowCommon Problems and How to Fix Them

Even with the best tools, things don't always go smoothly. Here are solutions to the most common background removal headaches:
Problem: White or Black Edges (Halos)
What's happening: Remnants of the original background are blending with edge pixels, creating visible outlines.
Solution: In Photoshop, use Layer > Matting > Remove White Matte (or Remove Black Matte). In other tools, try contracting your selection by 1-2 pixels before applying the mask, or use the Defringe option.
Problem: Transparency Turns White/Black When Saved
What's happening: You're likely saving as JPEG, which doesn't support transparency.
Solution: Always save as PNG or WebP when you need transparency. Double-check your export settings - some applications default to JPEG.
Problem: AI Removed Part of My Subject
What's happening: The AI misidentified part of your subject as background, often due to similar colors or unusual shapes.
Solution: Use manual refinement tools to paint back the missing areas. Most AI tools include brush options to mark areas that should be foreground or background.
Problem: Jagged or Pixelated Edges
What's happening: Low image resolution, over-aggressive selection, or saving as GIF (which doesn't support partial transparency).
Solution: Start with higher resolution images. Apply a slight feather (0.5-1px) to selections before masking. Save as PNG, not GIF.
Problem: Semi-Transparent Areas Are Fully Transparent
What's happening: Some tools treat transparency as binary (on/off) rather than supporting the full alpha range.
Solution: Use tools that specifically support alpha channel preservation. Photoshop and GIMP handle this well; simpler online tools may not.
Batch Processing: Removing Backgrounds from Multiple Images
Need to process dozens (or hundreds) of images? Doing them one-by-one would take forever. Here are your options for batch background removal:
Online Batch Tools
Several online services offer bulk processing:
- Remove.bg API - Process images programmatically via their API (paid service, credits required)
- PhotoRoom - Offers batch processing in their business plans
- Clipping Magic - Supports multiple image uploads with batch export
Photoshop Actions and Batch Processing
If you have Photoshop, you can create an Action that records your background removal steps, then apply it to a folder of images:
- Open Window > Actions
- Create a New Action and start recording
- Perform your background removal steps (Select Subject, add mask, etc.)
- Save As PNG to your output folder
- Stop recording
- Go to File > Automate > Batch, select your action and input folder
API Integration for Developers
For large-scale or automated workflows, most background removal services offer APIs. You can integrate these into your existing systems, e-commerce platforms, or content management workflows to process images automatically as they're uploaded.
Frequently Asked Questions
What file format should I save my transparent image as?
Save as PNG for maximum compatibility, or WebP for smaller file sizes on modern platforms. Never save as JPEG if you need transparency - it will replace transparent areas with solid white.
Why does my transparent PNG have a white background when I email it?
Email clients often don't render transparency in preview thumbnails, showing white instead. The actual file still has transparency - try downloading and opening it in an image viewer or editor to confirm.
Can I make a JPEG transparent?
You can't add transparency to a JPEG file directly. However, you can open the JPEG, remove the background using any of the methods above, then save as PNG to preserve the transparency.
Why do AI tools struggle with some images?
AI background removal works by detecting contrast between subject and background. Images with low contrast, similar colors, or complex overlapping elements (like hair against a similarly-colored background) are more challenging. Manual refinement may be needed.
How do I make a logo transparent?
Logos are typically simpler than photos. If your logo is on a solid white or black background, tools with "magic wand" or "select by color" features work well. Select the background color, invert selection, and delete. For complex logos, the same AI tools used for photos work great.
Is it possible to add transparency to video?
Yes, but it requires video formats that support alpha channels, such as Apple ProRes 4444 or WebM. This is commonly called "green screen" or "chroma keying" - filming against a solid color background, then removing that color in editing.
Conclusion
Removing backgrounds and creating transparent images has never been easier. What once required expensive software and professional skills can now be accomplished in seconds with free AI-powered tools. Whether you choose the convenience of online tools like our background remover, the precision of Photoshop, or the free power of GIMP, you have options for every budget and skill level.
Remember the key points: always save as PNG or WebP to preserve transparency, check your results on multiple background colors, and don't be afraid to combine AI automation with manual refinement for the best results. Your images deserve to float freely, unencumbered by those pesky rectangular backgrounds.
Now go forth and make some backgrounds disappear!