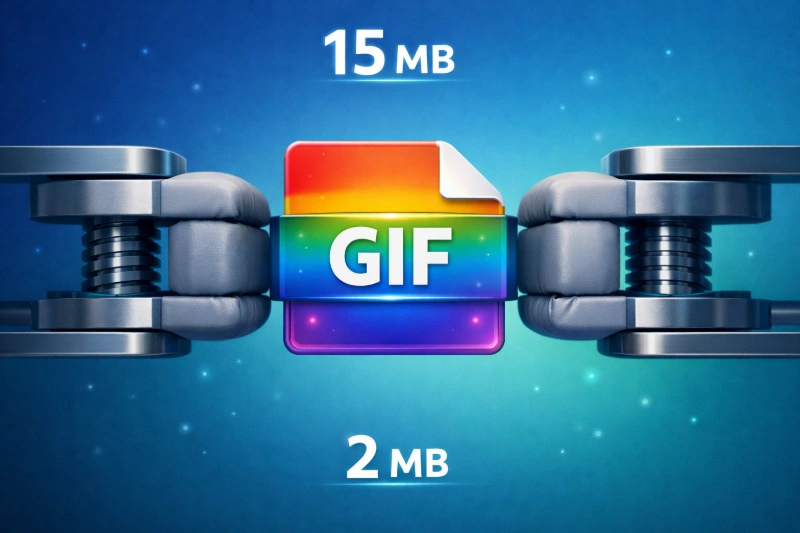
Large image files slow down websites, eat up storage space, and frustrate users with long loading times. The good news? You can dramatically reduce image file sizes - often by 50-80% - without any visible quality loss. This guide covers the best techniques, tools, and strategies to compress your images effectively in 2025.
Whether you're optimizing images for a website, preparing photos for email, or freeing up storage space, understanding image compression is essential. We'll explore both lossless and lossy compression methods, helping you choose the right approach for every situation.
Why Image File Size Matters
Image file size impacts more than just storage. Here's why optimization should be a priority:
Website Performance: Images account for roughly 50% of a typical webpage's total size. Google's Core Web Vitals directly measure loading performance, making image optimization crucial for SEO rankings. A one-second delay in page load time can reduce conversions by 7%.
User Experience: Mobile users on slower connections abandon pages that take more than 3 seconds to load. Optimized images ensure your content reaches everyone, regardless of their connection speed.
Storage and Bandwidth: Smaller files mean lower hosting costs and faster backup times. For businesses handling thousands of images, the savings add up quickly.
Email Deliverability: Email providers often block or flag messages with large attachments. Compressed images ensure your emails reach their destination without issues.
Understanding Image Compression
Before diving into techniques, let's understand the two main types of compression:
Lossless Compression
Lossless compression reduces file size without removing any image data. The original image can be perfectly reconstructed from the compressed version. This method typically achieves 10-30% size reduction.
Think of it like this: Lossless compression is like vacuum-packing a suitcase. You're squeezing out the air (redundant data) to make it smaller, but when you unpack, every single item is still there exactly as you packed it. Nothing is removed - it's just stored more efficiently.
Best for: Screenshots, text-heavy images, logos, graphics with sharp edges, and any image where you need to preserve every pixel exactly.
Formats: PNG (with optimization), WebP (lossless mode), TIFF (LZW compression)
Lossy Compression
Lossy compression permanently removes some image data to achieve much smaller file sizes - often 50-90% reduction. The key is that well-implemented lossy compression removes data that's imperceptible to the human eye.
Think of it like this: Lossy compression is like summarizing a novel into a detailed synopsis. You're keeping all the important plot points and character details that matter, but removing filler words and minor subplots that most readers wouldn't notice are missing. The story reads the same, but it takes up far less space.
Best for: Photographs, complex images with gradients, web images where some quality trade-off is acceptable.
Formats: JPEG, WebP (lossy mode), AVIF
Pro Tip: The "quality loss" in lossy compression is often invisible at quality settings of 80-85%. Most viewers cannot distinguish between an original and a well-compressed image side by side.
Best Methods to Reduce Image Size
1. Use the Right File Format
Choosing the optimal format is often the single biggest factor in file size:
JPEG
Best for photographs and complex images. Offers excellent compression for realistic images with millions of colors.
PNG
Best for graphics, logos, and images with transparency. Supports lossless compression but larger than JPEG for photos.
WebP
Modern format offering 25-35% smaller files than JPEG/PNG with equivalent quality. Supported by all modern browsers.
AVIF
Newest format with best compression ratios - up to 50% smaller than JPEG. Growing browser support makes it increasingly viable.
Not sure which format to use? Our Image Compressors automatically select optimal settings, or you can convert between formats using our JPG to WebP or JPG to AVIF converters.
2. Resize Images to Actual Display Dimensions
One of the most overlooked optimization techniques is simply resizing images to their actual display size. If your website displays images at 800px wide, uploading a 4000px wide image wastes bandwidth.
The math is compelling: A 4000x3000 pixel image contains 12 million pixels. Resizing to 800x600 reduces it to 480,000 pixels - a 96% reduction in data before any compression is applied.
Use our Image Resizer to quickly resize images to your target dimensions while maintaining aspect ratio and quality.
3. Adjust Quality Settings Strategically
For JPEG and WebP images, the quality slider is your primary control for balancing size versus quality:
- 90-100% quality: Minimal compression, near-original quality. Use for professional photography or archival purposes.
- 80-89% quality: Sweet spot for most uses. Significant size reduction with imperceptible quality loss.
- 70-79% quality: Noticeable on close inspection but acceptable for thumbnails and decorative images.
- Below 70%: Visible artifacts. Only use when file size is critical and quality is secondary.
4. Remove Unnecessary Metadata
Digital images contain hidden metadata (EXIF data) including camera settings, GPS location, timestamps, and more. This data can add 10-50KB to each image.
Stripping metadata reduces file size and protects privacy - you probably don't want to share your exact GPS coordinates with every photo you post online.
5. Use Specialized Compression Tools
Generic image editors often produce larger files than dedicated compression tools. Purpose-built compressors use advanced algorithms optimized specifically for size reduction.
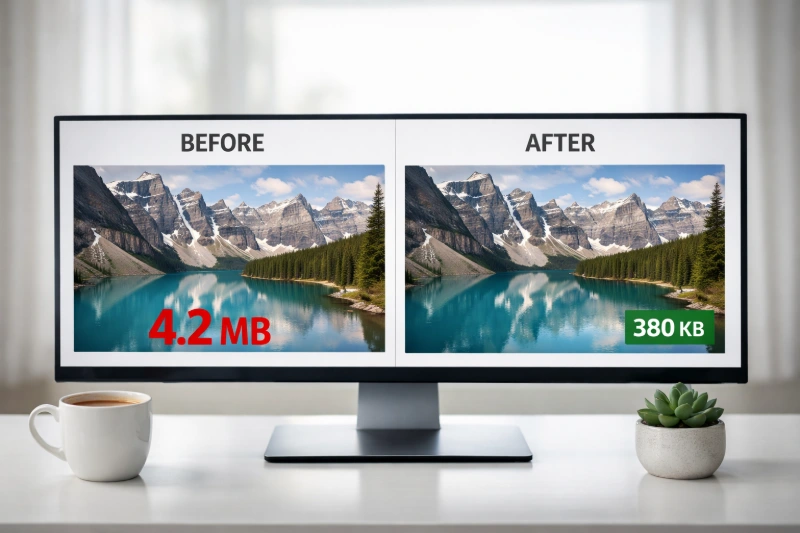
Our Image Compressors use intelligent compression that analyzes each image and applies optimal settings automatically, often achieving 60-80% size reduction with no visible quality loss.
Optimal Compression Workflow
Getting the best results requires a systematic approach. Here's the workflow professional designers and web developers use:
Start with the Right Source
Always begin with the highest quality original you have. Compressing an already-compressed image compounds quality loss. If possible, work from RAW files or uncompressed originals, applying compression only at the final export stage.
Determine Your Target Dimensions
Before any compression, know exactly how large your image needs to be. For web use:
- Hero images: 1920px wide maximum (consider 2x for retina)
- Content images: 800-1200px wide
- Thumbnails: 300-400px wide
- Social media: Platform-specific (Instagram: 1080px, Facebook: 1200px)
Resize first using our Image Resizer, then apply compression. This order matters - compressing oversized images wastes processing and produces suboptimal results.
Select Format Based on Content
Match the format to your image type:
- Photographs: JPEG, WebP, or AVIF
- Graphics with transparency: PNG or WebP
- Simple graphics/logos: SVG (vector) or PNG 8-Bit
- Animated content: WebP or optimized GIF
Apply Compression Intelligently
Run your properly-sized image through our Image Compressors. Start at 85% quality and adjust based on the preview. Most images look identical to the original at this setting while being 60-70% smaller.
Verify Before Publishing
Always check your compressed image at actual display size on a quality monitor. Look for compression artifacts in gradients, around text, and at high-contrast edges. If visible, increase quality by 5% and recompress.
Format-Specific Tips
Optimizing JPEG Images
JPEG is the workhorse format for photographs. To get the best results:
- Use quality settings between 75-85% for web use
- Enable progressive JPEG for better perceived loading speed
- Avoid re-saving JPEGs multiple times - each save adds more compression artifacts
- Keep original files and compress copies for distribution
Optimizing PNG Images
PNG is ideal for graphics but can produce large files. Optimize by:
- Reducing color palette when full 24-bit color isn't needed
- Using PNG-8 for simple graphics (256 colors maximum)
- Converting to WebP for better compression with transparency support
- Using our PNG to ICO Converter when creating icons from PNG files
Optimizing WebP and AVIF
Modern formats offer the best compression but require attention to compatibility:
- Provide JPEG fallbacks for older browsers when necessary
- Use quality 80-85% - the efficiency gains allow slightly higher quality settings
- AVIF excels at very low bitrates where JPEG would show heavy artifacts
- Convert existing images using our JPG to WebP tool
Common Mistakes to Avoid
1. Over-compressing: Pushing quality too low creates visible artifacts and actually hurts user experience. Finding the right balance is key.
2. Using PNG for photographs: PNG is lossless but creates enormous files for photos. A 5MB PNG might compress to 500KB as a JPEG with no visible difference.
3. Not resizing before compressing: Compression works best on appropriately-sized images. Compressing a 4000px image then displaying it at 400px wastes bandwidth.
4. Forgetting about retina displays: Modern screens have high pixel density. For truly sharp images, provide 2x resolution versions (e.g., 1600px for an 800px display slot).
5. Ignoring format selection: Converting all images to one format ignores the strengths of each. Use JPEG for photos, PNG for graphics with transparency, and WebP/AVIF when browser support allows.
Batch Processing Multiple Images
When you need to optimize many images at once, efficiency becomes crucial. Our tools support batch processing:
The Image Compressors accept multiple files simultaneously, applying consistent optimization settings across your entire batch. This is perfect for:
- Preparing product photos for an e-commerce site
- Optimizing an entire photo gallery
- Processing images before uploading to a CMS
- Reducing storage usage on cloud services
For large-scale operations, consider establishing a consistent workflow: resize to maximum needed dimensions, convert to your target format, then apply compression.
Measuring Compression Results
How do you know if your compression is successful? Consider these metrics:
File Size Reduction: Aim for 50-80% reduction for photographs. Graphics may achieve 20-40% with lossless compression.
Visual Quality: View the compressed image at 100% zoom on a quality monitor. Look for:
- Blocking artifacts (square patterns, especially in gradients)
- Color banding (visible steps in gradients)
- Ringing (halos around high-contrast edges)
- Loss of fine detail in textures
Pro Tip: Want to see exactly what changed? Our Image Analyzers let you compare your original and compressed files side-by-side. Check file size, dimensions, color depth, and compression metadata to verify your optimization worked - no guesswork required. Try the PNG Analyzer or JPG Analyzer for detailed breakdowns.
Page Load Impact: Use browser developer tools or services like Google PageSpeed Insights to measure the real-world impact on page load times.
Frequently Asked Questions
What is the best image format for quality and small file size?
WebP offers the best balance of quality and compression for most uses, providing 25-35% smaller files than JPEG at equivalent quality. AVIF is even more efficient but has slightly less browser support. For maximum compatibility, JPEG at 80-85% quality remains excellent for photographs.
How much can I compress an image without losing quality?
Most photographs can be compressed by 50-80% without visible quality loss when using proper techniques. The key is resizing to actual display dimensions first, then applying compression at 80-85% quality. Lossless compression typically achieves 10-30% reduction with zero quality loss.
Should I use lossy or lossless compression?
Use lossy compression for photographs and complex images where maximum size reduction matters. Use lossless compression for graphics, logos, screenshots, and images with text where pixel-perfect accuracy is important. Many workflows use lossless for master files and lossy for web distribution.
Does compressing images affect SEO?
Yes - positively! Google's Core Web Vitals measure page loading performance, and images are typically the largest page elements. Optimized images improve page speed scores, which directly influences search rankings. Google recommends using modern formats like WebP and properly sizing images.
What's the ideal image size for websites?
For most websites, images should be no wider than 2000px for full-width hero images, 1200px for content images, and 400-600px for thumbnails. Account for retina displays by providing 2x resolution images. File sizes should generally stay under 200KB for content images and under 500KB for hero images.
Conclusion
Reducing image file size without losing quality is both an art and a science. By understanding compression types, choosing the right formats, and following a systematic optimization workflow, you can dramatically reduce file sizes while maintaining visual excellence.
The key takeaways:
- Resize images to actual display dimensions before compressing
- Choose the right format for each use case
- Use quality settings of 80-85% for invisible lossy compression
- Consider modern formats like WebP and AVIF for better efficiency
- Use specialized compression tools for best results
Ready to Optimize Your Images?
Try our free tools to compress, resize, and convert your images instantly.
Compress Images Resize Images